Deploy an Azure VM from a custom image using ARM templates
Most of the companies we work with need to be able to build Azure VMs from custom OS images. This makes a lot of sense, most organizations use fairly specific software packages and other configurations and ensuring that every virtual machine is based on a known configuration is good practice. But with Azure moving from the classic deployment model to Resource Manager, it’s not as straight forward as it once was.
The best way to deploy VMs from custom images in Resource Manager is via ARM templates. The ARM template model allows you to avoid dealing with some of the more esoteric aspects of Azure CLI and Azure Powershell and instead use simple declarative json templates to define and execute the deployment. Using ARM templates allows you to deploy or update resources for an entire solution in a single, coordinated operation. The consistency that this practice creates improves security and the templates end up being very handy documentation for your environment.
The first thing you need to do is create a custom vhd. This can be done inside or outside of Azure, however, if you do it outside of Azure I recommend you build the image in Hyper-V. Microsoft has some great resources available on capturing custom Windows and Linux images. Additionally, you’ll want to fire up Visual Studio (Community Edition will work and VS Code also supports ARM templates too) and follow these instructions for getting the project setup.
The ARM Template
Now the fun part: building out the ARM template. Make sure that your custom vhd is in the same storage account as you plan on using to deploy the VM. You’ll also want to make sure you have the url for your vhd handy. You can find it by going to your storage account > blobs > vhds >your_custom_image.vhd.
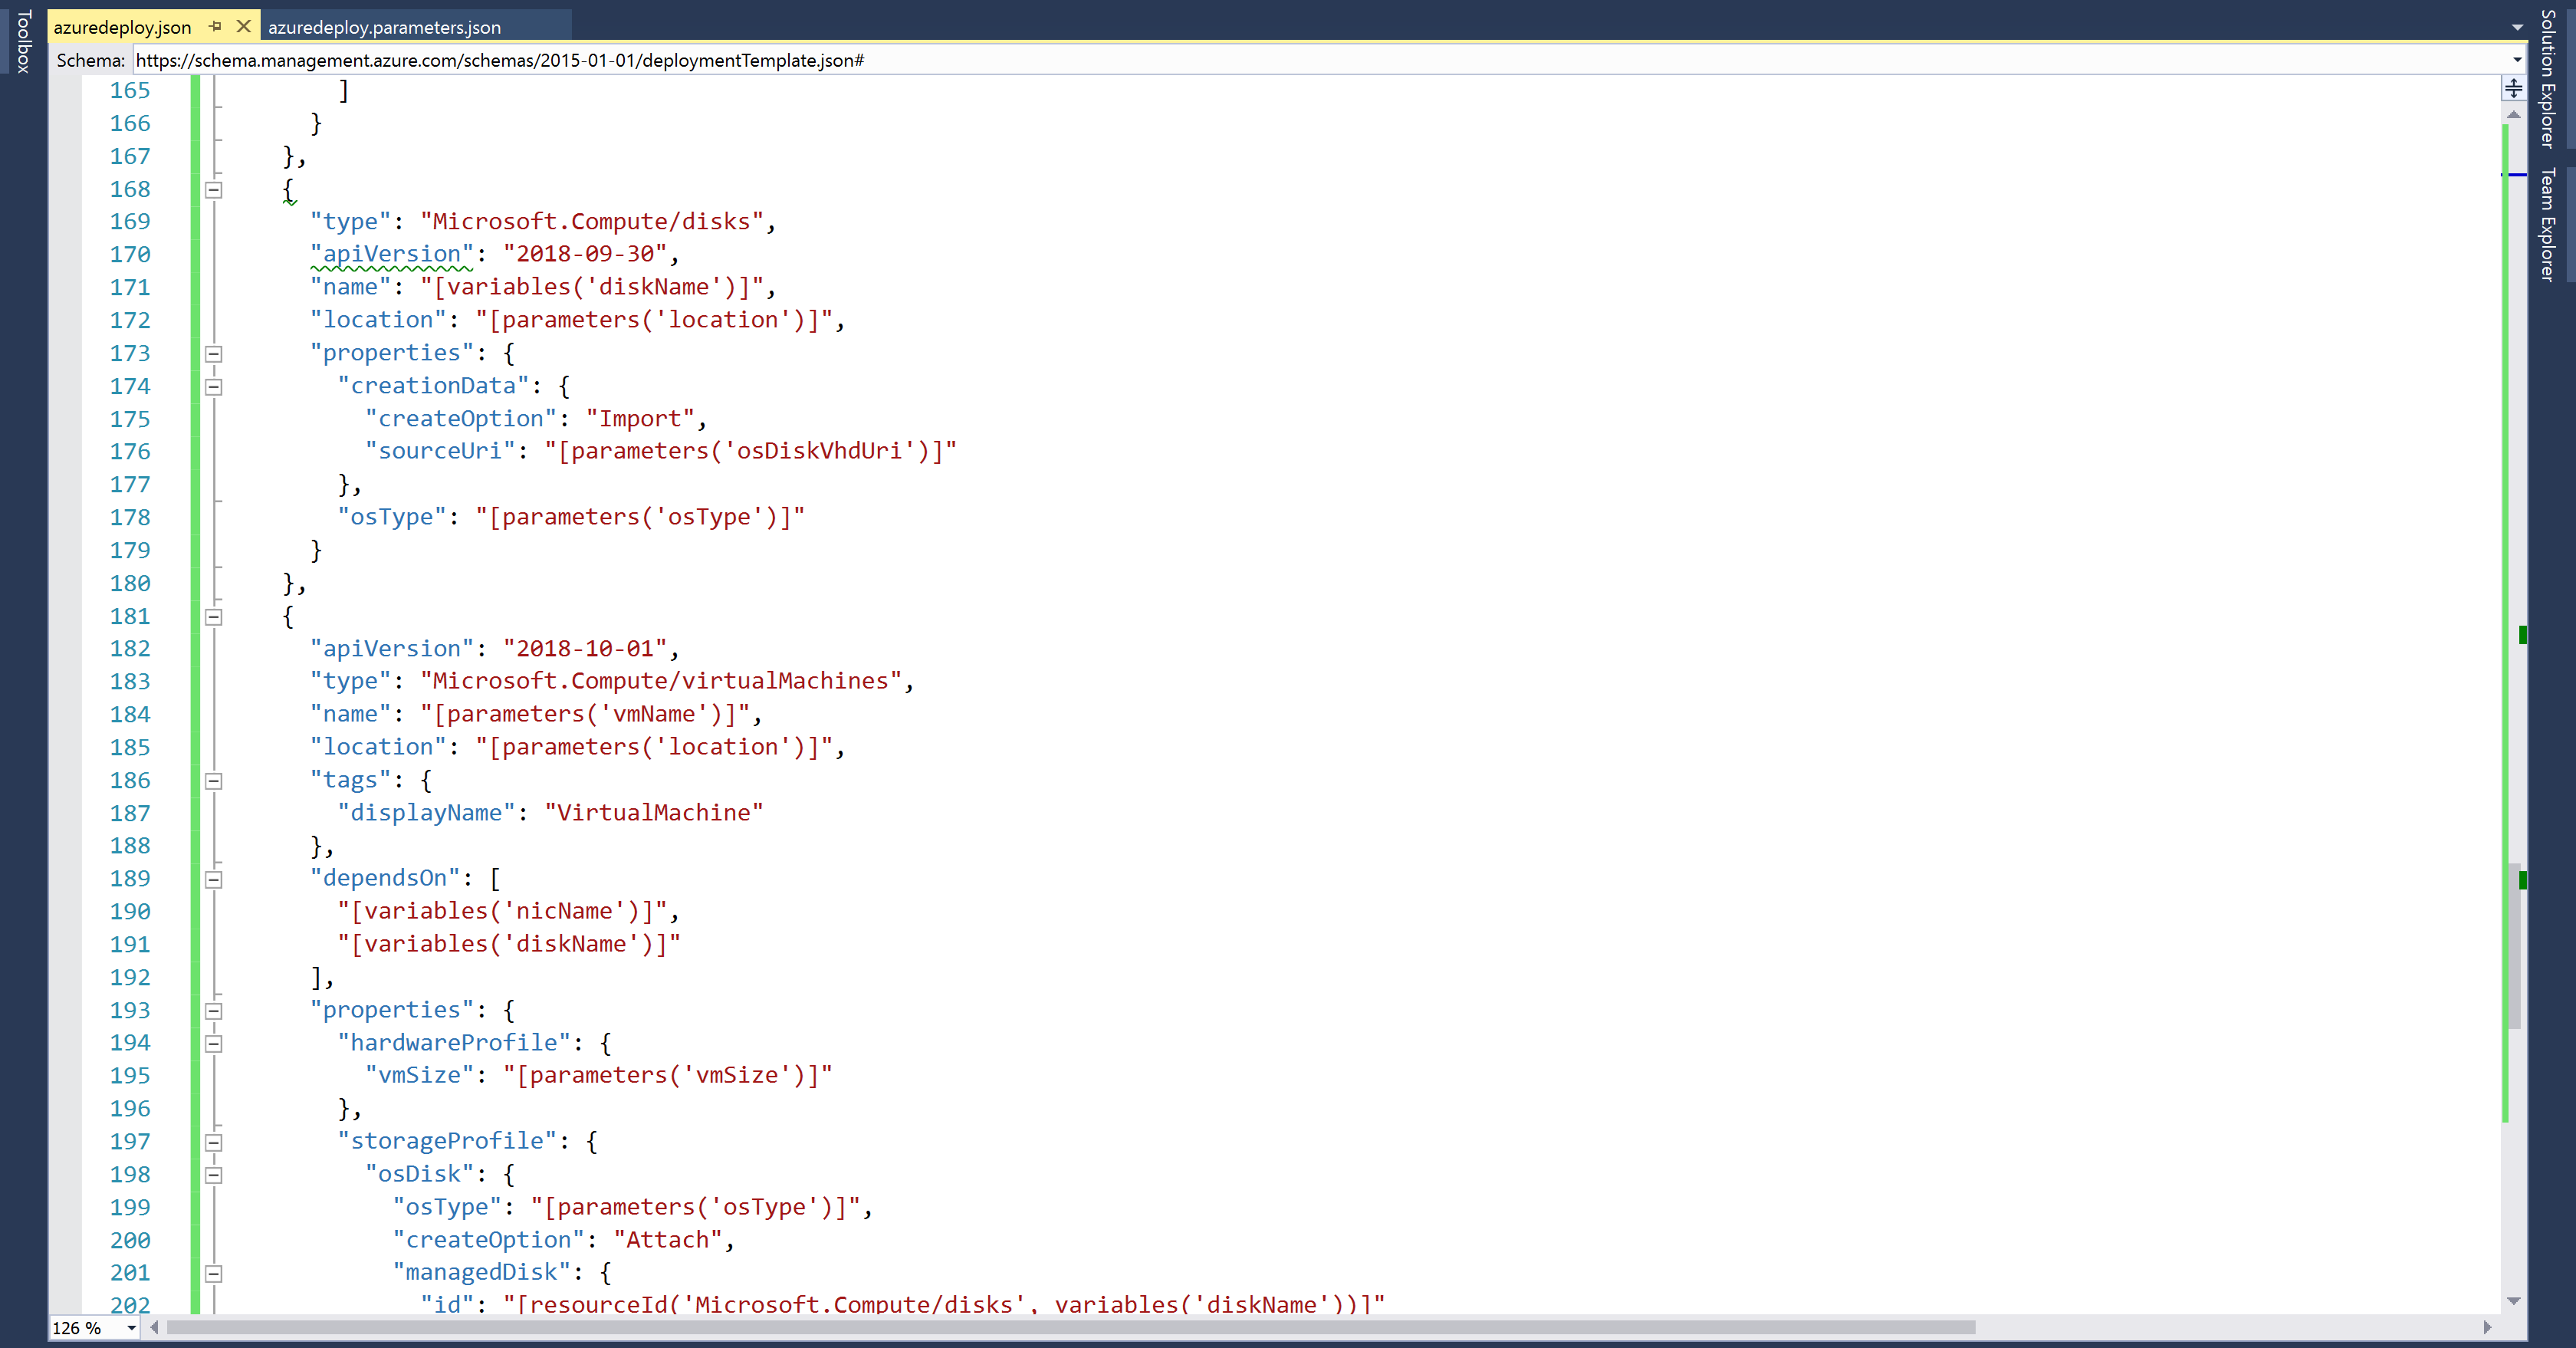
The ARM template, in a very simplistic form, is two files: an azuredeploy.json file that defines everything about that resource deployment and then a parameters file in which you can define values for certain objects that then get passed into the deployment file.
Below is an example of the main azuredeploy.json file which defines all of the resources in the deployment:
And here is an example of a parameters file. In this instance we’re using it to pass some simple values into the deploy file, namely user and pass, storage account name, vhd uri, and VM specifications.
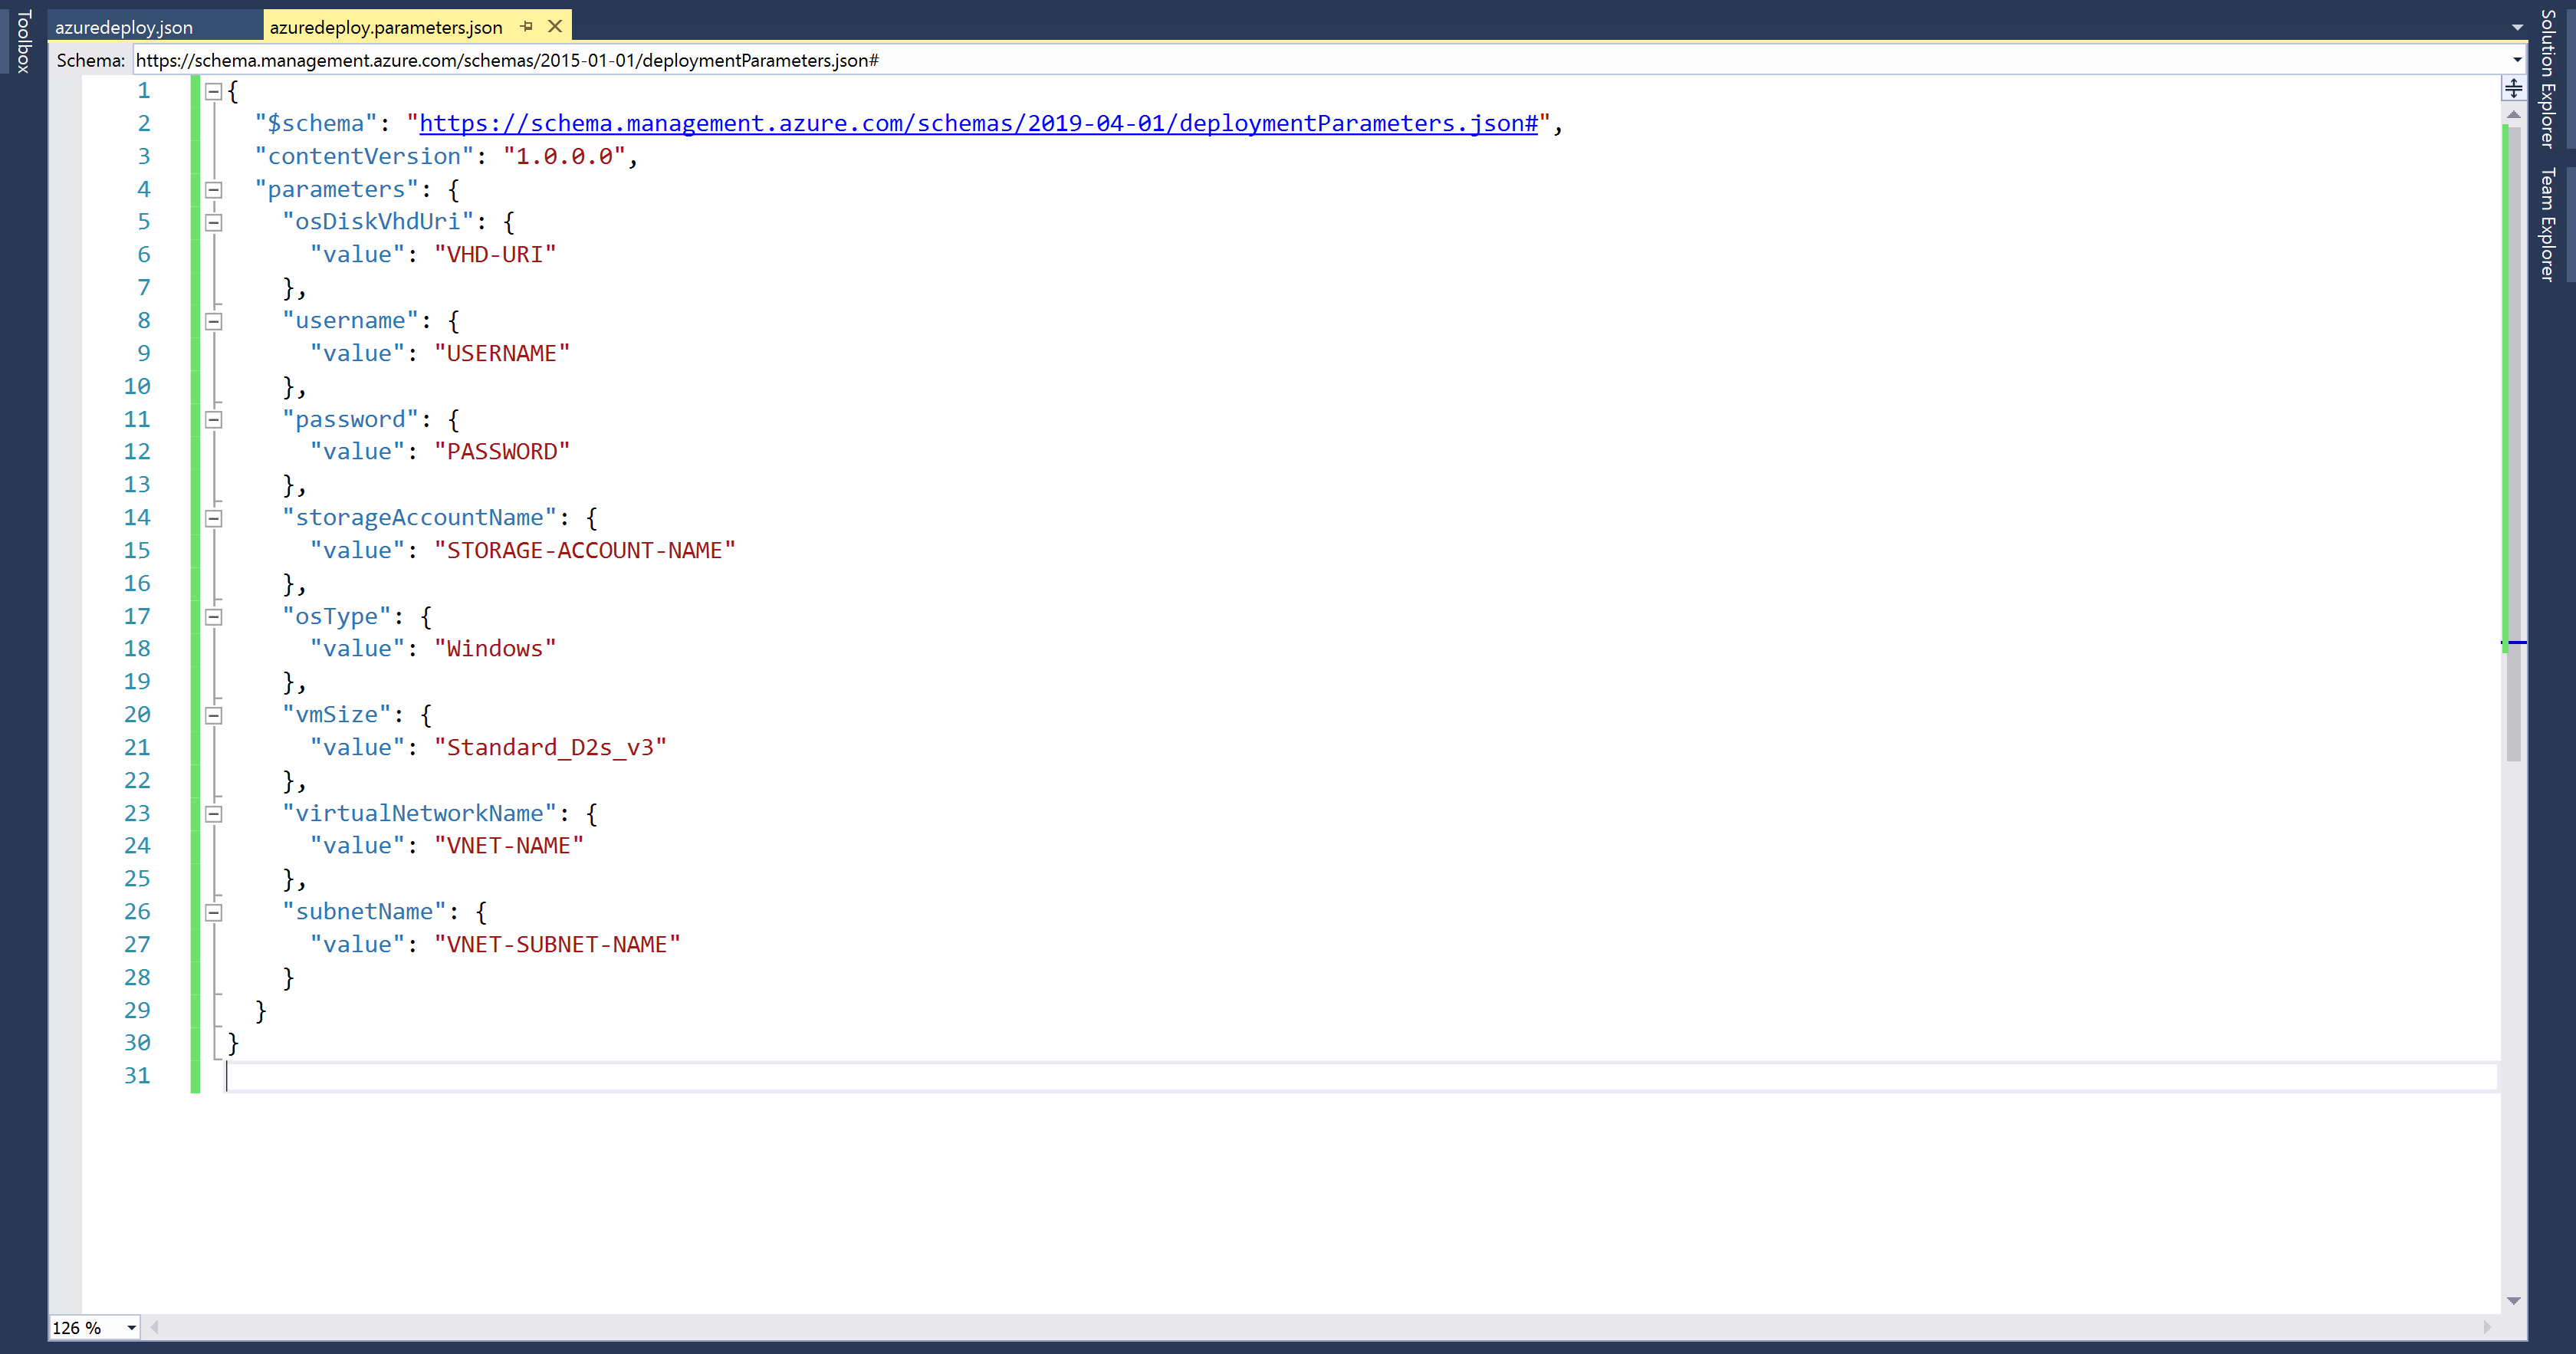
As you can see, the parameters file is pretty simple and it’s actually where most of the action happens (i.e. where the values specific to this deployment are defined).
I would recommend starting with a very basic existing template to start and you can find on in the Azure Quickstart Templates repo on Github. Go ahead and browse to the 101-vm-from-user-image template and use that as your baseline. There are cleaner ways to do this, but the way I do it is copy the contents of the azuredeploy file and the parameters file into your corresponding files in your visual studio project.
Once you have an azuredeploy.json and azuredeploy.parameters.json that match up with the quickstart template you’ll want to adjust the values to match your Azure resources. As you can see above, I added parameters that defined the storage account I wanted to use (this is important because this needs to be the same storage account that the vhd is stored in) and referenced the uri for the vhd itself. You can add any values that you want to get passed into the deploy template as part of this operation.
Deployment
Once you’ve definite all the necessary values for your resources in the template files it’s time to deploy. If you look to the right pane in your Visual Studio window you’ll see the Solution Explorer, right-click on your project name and select ‘Deploy’. It will prompt you to enter your Azure credentials if you haven’t and then you’ll see the deploy to resource group window.
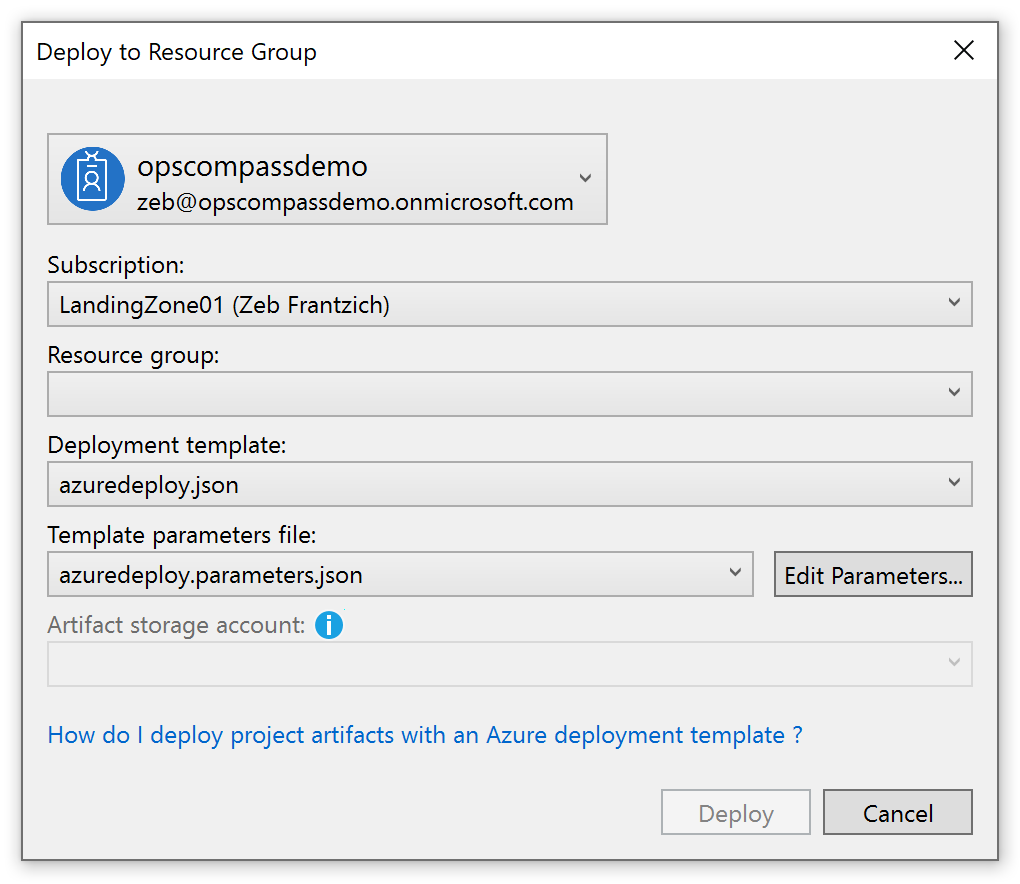
Choose your subscription and a resource group making sure that resource group matches up with the resources you defined in your template. Now, you’re ready to go ahead and hit the deploy button! I don’t think I’ve ever done one of these that didn’t error out at least once, so don’t worry if your first one fails. You’ll be able to see the output of the operation as it’s happening and if it fails you can just scroll through and see what the error was. Most of the time it is something simple like a resource didn’t have a valid name or it had a duplicate name.